Deployment
- ASPX Deployment
- Changing Project Type
- Http.sys Applications
- Stand Alone Server / Service Deployment
- Uploading Large files in IIS
- Using URLRewrite in IIS
ASPX Deployment
|
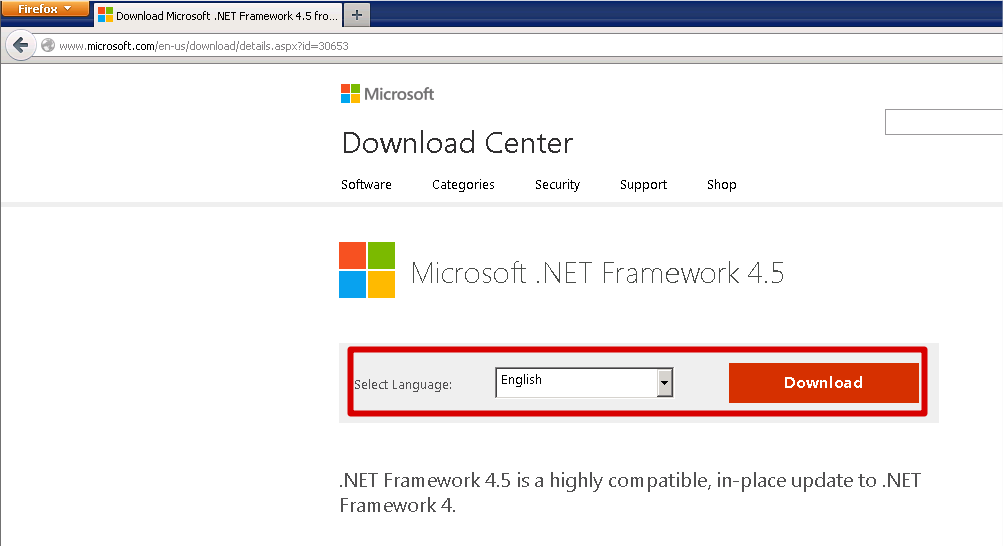
ASPX deployment was introduced in IntraWeb XIV and allows you to deploy your application as a ASP.NET application. Your application is still Delphi, 100% Delphi native code, but there is a ASP.NET wrapper between IIS and your IntraWeb library. 1. Pre-requisites1.1. Internet Information Services (IIS) 1.2. .NET Framework version 4.5 1.3. ASP.NET MVC 4 This tutorial was created using Windows 2008 R2 Server. Windows 7 and Windows 2012 have similar procedures. 2. Installing the pre-requisites on your Windows Server2.1. Download and install .NET Framework 4.5, if not yet installed. Download link (english): http://www.microsoft.com/en-us/download/details.aspx?id=30653
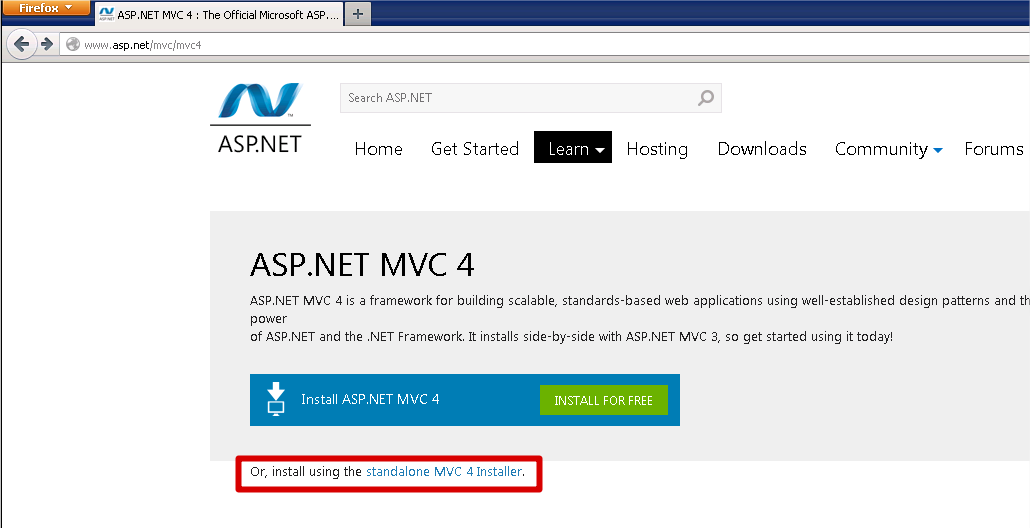
2.2. Download and install ASP.NET MVC 4, if not yet installed. This package is not part of .NET Framework install and must be downloaded and installed separately. Download link: http://www.asp.net/mvc/mvc4 Choose to install using "standalone MVC 4 Installer" and not the web installer.
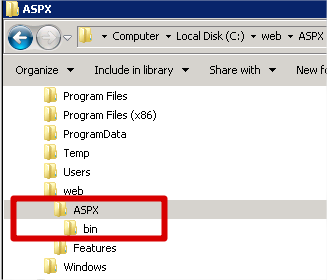
After installing both packages, please reboot your Windows Server. 3. Copy all required files to your Windows Server3.1. Copy ASPX deployment files3.1.1) Copy all ASPX deployment files to some folder on your Windows Server. It is a good idea to keep them isolated from your application files. In this tutorial we will create a folder named ASPX and a BIN subfolder, like this:
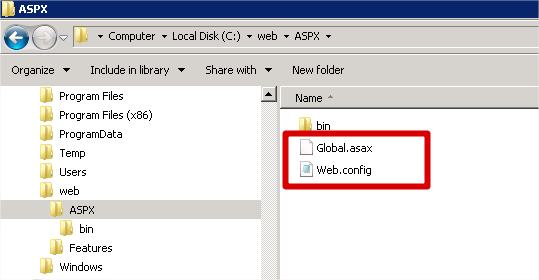
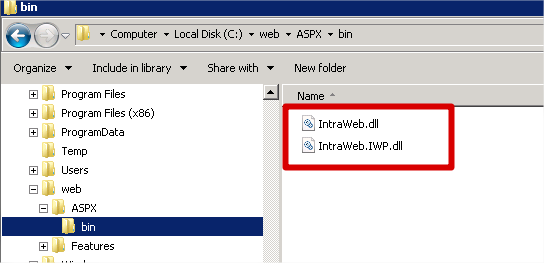
3.1.2) Inside ASPX folder you must copy Global.asax and web.config files. Inside bin subfolder you must copy IntraWeb.dll and IntraWeb.IWP.dll:
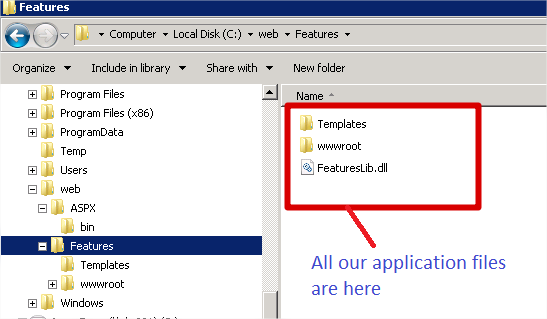
3.2. Copy application filesNow you should copy all your application files. As we said before, it is a good idea to keep it isolated from ASPX deployment files. So lets create a new directory where we will copy all our application files. In this tutorial we will use the Features demo, now compiled as an IW Library for ASPX deployment:
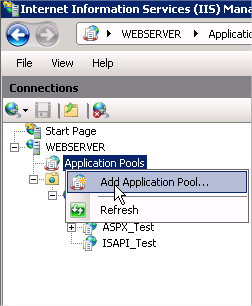
4. IIS Setup4.1. Create an application pool4.1.1) Run Internet Information Services Manager 4.1.2) Select "Application Pools", right-click it and choose "Add Application Pool...".
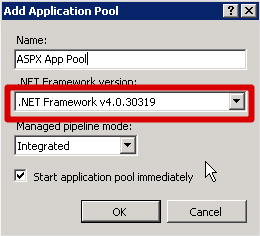
4.1.3) Configure basic settings for the new application pool. You can name it with any name you want. We will name it "ASPX App Pool" in this tutorial. Please note the .NET framework version used.
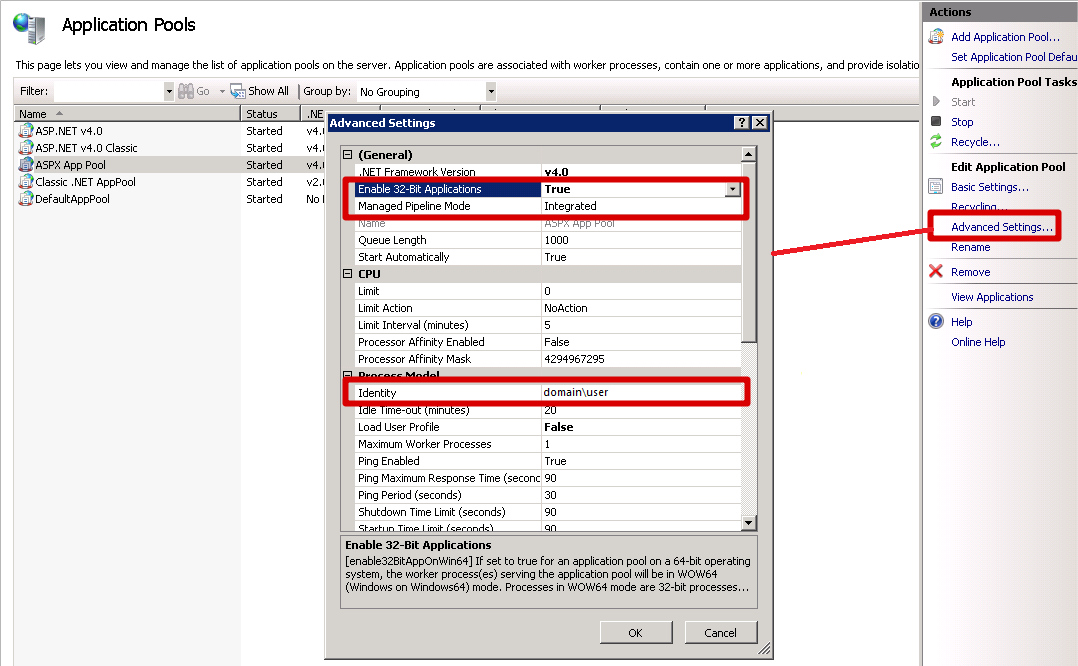
4.1.4) Configure advanced settings for the new application pool. You must set these properties:
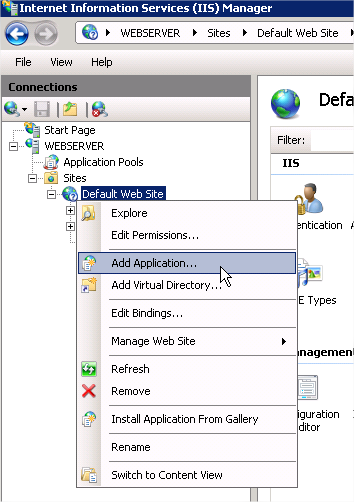
4.2. Create a new web application in IISNow that we already have a new application pool, we are ready to create the web application in IIS. 4.2.1) Select "Default Web Site", right-click it and choose "Add Application...".
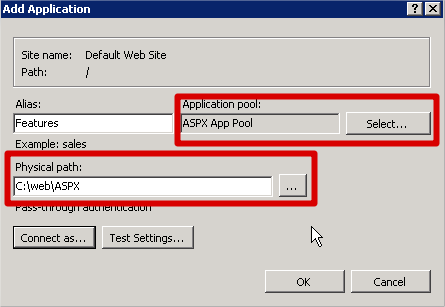
4.2.2) Configure the new application. Give a name for the application (remember that this name is part of the URL of the application), select the correct application pool and set the physical path to the ASPX directory (created on section 3.1 above).
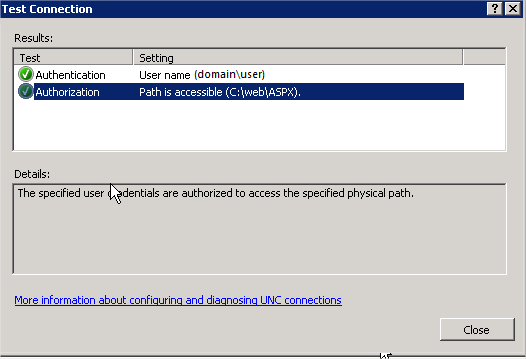
Also you should set the itentity used by your application, clicking "Connect as..." and then clicking on "Test settings..." button to check if it was successful. The user MUST have reading NTFS permissions in both ASPX and Features directories (in our sample).
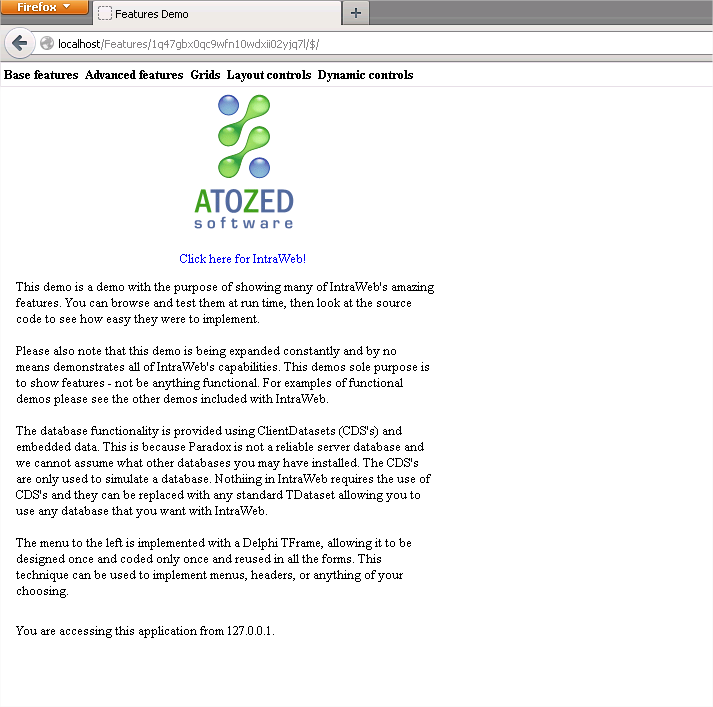
5. Application configurationNow that IIS setup is complete, we have to configure the application. This is done editing the web.config file, in ASPX directory created on section 3.1 above. You may download our sample web.config file here. Then save it as "web.config" to your ASPX directory. Follow the comments marked as STEP 1 to 4 in the sample web.config file, and change the values according to your application. Changed values are bold: <!-- STEP 1: Change "value" below to match your application name under IIS --> <!-- STEP 2: Change "value" below to match your IntraWeb Library (DLL) module --> <!-- STEP 3: Change "value" below to "true" if you are using IWP (IntraWeb pages). Otherwise leave it as "false" --> <!-- STEP 4: Change "debug" value below to "false" if you are deploying in PRODUCTION environment --> Save and close the file. 6. Testing the installationNow open your browser and type the appropriate URL. In our case it is: http://localhost/Features Note that there is no FeaturesLib.dll at the end of the URL like when you deploy an ISAPI application. It works!
|
